Friday, October 29, 2010

Heart Pumping Creative Halloween

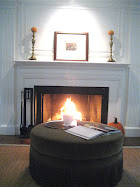
Halloween decor at our prior home in California
Halloween design above via me.  My daughter is obviously very happy here because I have passed on my love of Halloween on to her.  I think it is a good thing because it is such a great way to get creative.  Getting creative is what makes you feel truly alive!  If it gets your heart pumping than you are on the right track and doing what you love! The rest of the photo's below are from Martha Stewart.  I really need to work for Martha!  I think that would be a dream job.  These images below are some of my favorites and I really have to try to do some of them next year.  I hate when I say that..."I will do it next year".  Usually two years end up flying by before I get to it!

The use of moss is underated!


I am wild about mushrooms!  Who would have thought to do this?  Martha of course!

Gray, gray and more gray!  One of my favorite colors!


This ghostly graveyard is fabulous!  

Happy Halloween!
xojamilyn

First photo property of Living It At Home, The rest from Martha Stewart Living


Friday, October 22, 2010

Finger Lickin' Good...Ewww and Yum!

Are you trying to find that perfect treat to serve to your guests or trick-or-treaters?  Severed finger cookies will do the trick!  Warning:  They look so real that they may run screaming from them!  Seriously, I was so excited to make these and brought them into my daughter's first grade class (years ago) and the kids wouldn't touch them!  The adults had a great time eating them though!  I posted these last year and they are a huge hit so I am bringing them back!  The best Halloween cookie I have ever made mostly because it is so effective! They taste yummy too!  Make them if you dare!  Recipe below...


Bloody Severed Finger Recipe


1 cup butter, softened
1 cup confectioner's sugar
1 Egg
1 tsp almond extract
1 tsp vanilla extract
2 2/3 cup flour
1 tsp baking powder
1 tsp salt
3/4 cup almonds, whole blanched (not sure what blanched means, I just bought "slivered" almonds for the nails)
1 tube red decorator gel
 Preheat oven to 325

Cream the butter with powdered sugar.  Mix in egg, and extracts until creamy.  Sift and add the dry ingredients.  Blend to make a soft dough.  Wrap and refrigerate dough until it is easy to work with (about 15-20 minutes).  Roll into a finger shape about 3" long and 1/2" thick (They will rise when baked so make them smaller than you'd like the finished finger to be).  Place finger on lined cookie sheet.  Using a butter knife, lightly press a flat nail bed shape at the end of the finger and cut 3 lines in the middle of the finger to form knuckles.  Press lightly above and below knuckle to make finger more realistic (give it shape).  Bake at 325 degrees for 20-25 minutes.  Remove from oven and let cool for 3-5 minutes.  Put a bit of red gel in the nail bed and press the almond fingernails into the end of the finger.

*Arrange fingers on a nice platter, add some spiders to crawl over fingers.  Try and make them as real as possible!

Have fun making these and let me know if you do!

xojamilyn

Photo's taken via me, recipe via Living It At Home


Friday, October 15, 2010

Whimsical Halloween Wreath You Can Create For Your Door

My House
Spider Halloween Wreath Hand Made By Me!
What you will need
Large twig wreath from craft store (Micheals)
Black Paint
Black spray paint
White paint
Hot glue gun
Sponge for distressing effect
Wooden Halloween sign (mine says trick or treat)
Spiders (large, small, glittery spiders)
Cheese cloth
Halloween inspired ribbons (I used black, white and orange)
Glitter paint (Silver glitter)
Spider web for back of wreath
Orange fall leaves
White and black tulle fabric
Small battery operated halloween lights to string through wreath (optional)
Instructions For Spider Wreath
So now take all those yummy ingredients and get creative!  There is no right and wrong, just lots of fun to do!  First I spray painted the wreath black (let dry).  Then I used a lot of hot glue to add decorations to the wreath.  One suggestion is to put on those cheap plastic doctor gloves while aging the fabrics.  I put a little bit of black paint on my gloved hand and mushed up the fabric between my hands giving it a decrepit look.  I then tied it around different parts of the wreath tearing the edges for a better effect.  For the sign, I distressed that with a sponge and paint by dragging it across.  I also used glitter around edges too.  I then embellished with spiders and leaves and whatever else looks creepy!  I made this wreath about 6 years ago.  It is still holding up well.  It doesn't matter if it gets old and worn out looking, it just adds to its charm!  I hope you take on a fun and easy project like this! (I have made others and may post them too).  

Have fun!
~jamilyn

{Halloween Spider Wreath hand made by Living It At Home, Photo's via me}

Saturday, September 25, 2010

"Creepy Elegance"....I've Gone Batty!

Are we really here again...already?  Yes, start your planning now!  Just a friendly reminder to get movin'!  Every year {after the wonderful Halloween night has passed} I say, to myself, I am going to do better next year or do more or start earlier!  Fall is my favorite time of year and with it comes all the splendor of decorating for the season.  This bat project was relatively easy and didn't require too much commitment.  Kind of a last minute project I jumped at.  I think it gave me the desired affect I was looking for to decorate my front door (yes, that is my front door and my daughter).  I call it "creepy elegance".  Even though it is only September 24, I feel like I am behind in my planning.  Especially when you are looking for material for your blog!  I am determined to enjoy myself and not stress over how much I decorate this year.  If you would like to try to make these bats, please go here for my instructions.  Come join me and let's get creative!  My favorite thing to do...
"Gone Batty" photo property of Living It At Home

"Gone Batty" photo property of Living It At Home
Since I am in Halloween mode now, I am going to try and do a weekly post on decorating for Halloween or the Fall season.  I am going to see how it goes!  It is such a beautiful time of year here in Massachusetts!  I hope you are enjoying gorgeous weather wherever you may be!  I am looking forward to seeing all the beautiful leaf colors!
If you would like to share your Fall or Halloween projects please link up!  I would love to see them!
Stay tuned for more!
xojamilyn


Friday, October 30, 2009

On the Eve...

~~My Centerpiece~~


My daughter said that I didn't decorate enough.  I dug through all my boxes and came up with...


*Tattered and torn is all the rage*


Till tomorrow then...


*Images taken by "Living it at Home".  Last image, witch legs, unknown.


Tuesday, October 20, 2009

Gone batty with bats!

Behold~my flying bats project is complete!  I think it came out pretty good.  What do you think?  The decoration is simple, has great contrast, clean lines and is quite realistic in its own way.  It is very different from what I usually do every year.  Do you adore the mini pumpkins sitting on the ledge? 

This is my side entrance to my "tiny" mud room (that is a whole other story).  Decided to continue over here and tie it all together with my front door.  I think it was a success without much effort!  I may still work more in this area.  Have to do something with the two urns that I have in front of this door.  Needs something else.  Will post if and when I get to it.

Here are some photo's I managed to take of the project in progress.  Very easy to do.   You can find a link to the templates that is used for this felt bat by going here (Country Living).   I made three different sizes on my copy/printer.  I thought it would look more realistic to have different sized bats.  I bought the "stiff" felt at Michael's craft store for 99 cents each, I got ten sheets.  I was able to produce many bats, after you fold it, on one sheet.  I used a white pencil to trace, cut inside the lines.  You can use white chalk also.


Here is the template traced.  All you have to do is cut it out.

Here is the finished bat, very easy.  I used masking tape doubled over to adhere it  onto the outside of my house.


This is a decoration that I did several years back.  I really like using Millet to plant in my urns by the side door.  It looks creepy and is really tall.  However, it was sold out this year!  When done with Halloween, it still works for the rest of the season.  Found this bat at this amazing store in Alameda, California called Gaslight Emporium.  If you ever are in the San Francisco area and it is around Halloween, you have to go to this shop.  It is done up for the occasion with the best items to add to your Halloween decorating and collecting.  They also have a great sale at the end! (Correction:  friend in California told me that they sized down and are not displaying all of their spooktacular items anymore.  Closing shop?  What a shame!).

Here is my tiny, teeny mud room.  I have some ideas to make it appear more functional.  I will post about that later.  This paper mache pumpkin was something I picked up on sale.  It has another face on the other side.  It is from Dept. 56.  Isn't it cute?  I put our Halloween candy in it every year and let the kids pick out what they want when the bell rings...."Trick or Treat"!   The nest on the floor is from a Robin. They usually build one outside my back door every year.  I am collecting them now.
          
This was fun!
Have a great time decorating!


Jamilyn


{Photo's property of Living It At Home, taken via me}

Monday, October 19, 2009

Simple Halloween Crow Nest


Since I love my black crows for Halloween decorating, thought I would share this image.  This is a great way to showcase my crows!  Looks fairly easy.  Looking closely, it seems that they used a fake white pumpkin to carve out the nest.  Don't know if I can get to do this right now, will have to save it for next year.

*Image from Martha Stewart


Have Fun!
Jamilyn

Friday, October 16, 2009

Fun on Halloween

Creating and making these costumes over the years has been a challenge but fun.  Ghost Girl was a last minute idea because I had some extra cheese cloth.  I usually stock up on cheese cloth every year because you can dye it, paint it, or easily rip it up to make it look old and tattered.  Also, it sells out at the craft stores!  These are just some of the costumes we have done.

Really getting into being a ghost here...


Phantom Princess was based on this mask I found.  Just needed a lot of  torn cheese cloth and some black spidery lace.

Love to use black crows in the design.


Our Spider Fairy Costume creation.  We have so much fun coming up with a new idea every year.  Bought the wings and mask at Party City.  I had a  black cotton dress that I cut short.  Also used a velvet children's dress that was too small and cut it up for the top.  Had purple material already.  Made a sash and hot glued a sparkly spider to the front.


Notice cabbage in my black urns.  They make a simple yet perfect display for Halloween.  I also used spanish moss, white pumpkins and crows.


I just love this headless costume.  It is so believable.  I can't take credit for this one.


Take one if  you dare!  Just stay away from the broken fingernail one.  That looks way to real!


Yes, these are edible.  I have been making these now for a couple of years.  They are very realistic.  So much that when I serve them to my daughters friends, they are hesitant to eat them.  If you do dare a bite, they are yummy!

Tuesday, October 13, 2009

Halloween Shopping

Images from www.grandinroad.com .  Martha Stewart does it again with some of the best Halloween decorations I have seen.  These are just some of the items you can purchase.  


Her window images can transform your cozy home into a spooky one.


Never thought of decorating with a white owl.


This costume is actually for sale, but I bet this can be made easily.

Brooms that actually move around the room by themselves!


These hands are fun.  Great way to showcase them.  


Monday, October 12, 2009

Get Spooky and Inspired

This picture makes me want to cut out some felt bats.
Images from Country Living.  Give it a try!  I am.


Got some lace?  Use a paper dollie for a stencil and get beautiful detail.


This is a fantastic display.  There are those felt bats again!  This image is from Holly at Life in the Fun Lane.  Check out how she spray painted old frames and used prints for the images.

There is so many ways to be creative in decorating your home!
Have fun!
~Jamilyn