Friday, October 29, 2010

Heart Pumping Creative Halloween

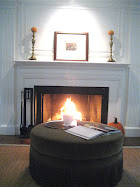
Halloween decor at our prior home in California
Halloween design above via me.  My daughter is obviously very happy here because I have passed on my love of Halloween on to her.  I think it is a good thing because it is such a great way to get creative.  Getting creative is what makes you feel truly alive!  If it gets your heart pumping than you are on the right track and doing what you love! The rest of the photo's below are from Martha Stewart.  I really need to work for Martha!  I think that would be a dream job.  These images below are some of my favorites and I really have to try to do some of them next year.  I hate when I say that..."I will do it next year".  Usually two years end up flying by before I get to it!

The use of moss is underated!


I am wild about mushrooms!  Who would have thought to do this?  Martha of course!

Gray, gray and more gray!  One of my favorite colors!


This ghostly graveyard is fabulous!  

Happy Halloween!
xojamilyn

First photo property of Living It At Home, The rest from Martha Stewart Living


Thursday, October 28, 2010

Stop And Take A Moment To Enjoy

Stop and take a moment to enjoy...before it is all gone!  These photo's are the result of me doing just that this morning!  With my camera in tow and my pup, we walked along beautiful paths enjoying this lovely fall morning!  The trees are starting to shed their leaves in preparation for the winter.  This prettiness is not going to last.  Why don't you just slow down today and enjoy.  Stop your car and get out at a pretty spot and look around.  If you are inside...get outside!  It truly is spectacular.  You don't want to miss it.  Have a wonderful fall day!


xojamilyn
Fall photo's taken via me and property of Living It At Home

Wednesday, October 27, 2010

Teen Room Updates

Some updates for my daughters room.  All selected by her.  Well, I did see the Thomas Paul pillow on Gilt Groupe and fell in love with how whimsical it was.  I then showed it to my daughter and she approved it!  The adorable silver side table I found at Home Goods for $49.00, a great deal.  I brought it home prepared to return it if she didn't like it-although I loved it and would have been heartbroken if she rejected it!  I placed it next her Ikea chair and when she came home from school she was smitten!  The other new additions are the Stockholm Rand rug from Ikea, the Ikea white slip-covered chair, and red Ikea velvet ottoman.  She just had to have the red ottoman and insisted the black and white rug would work.  I had my reservations but love how it all looks.  Youthful and fun. Still not sure on wall color and for now we are keeping the soft lilac walls.  Do you see all those books on her shelves?  There is an expensive habit going on here!  A good one for sure though!  My daughter loves to read and has to own her books so she can add them to her vast collection.  I think she counted around 550 or more!  We are quickly running out of bookshelves which presents another design dilemma.  She also has her own book review blog called Book Jacket.  Stop by and say hello!  She may have a book that a young person in your life may want to read.  I have read some of them myself!  Young adult books are not just for kids!
Her "to die for" antique bed.  My dog looks very comfy doesn't she? To read more on decorating her room go here.  Another idea for around her antique bed is to hang curtain rods from ceiling and hang colored sheers for a canopy effect.  We will see!
Stay tuned for more!

xojamilyn

{Photo's via me and property of Living It At Home}


Monday, October 25, 2010

Crows At Your Door On A New England Day

This is by far one of my most favorite Halloween decorated homes. I drive by every year and I decided that I was going to take a picture to share!  It is so simple yet effective in casting an eeeery appearance at the front door.  I love simplicity when decorating and this is the best example of it.  Using the natural elements of nature, the branches, and the black crows (my favorite) creates a most striking front door display (having that great black door helps...love black doors).  I have a question....is it proper to just take this photo and not let the home owner know that you are publishing it?  I did remove the house number so I feel it is completely private.  I do however feel that the very creative person that did this would probably enjoy that I am so interested!  Maybe I will knock on their door and say "Hi!  You don't know me but I have a blog and I love your home and did a feature on your decorations!"  I don't think that would be to bad. 
I am really enjoying living in New England right now.  The weather and the fall colors are just amazing!  While I had my camera, I went around snapping some photo's around town while I was running errands.  I really tried to capture the colors.  One can really feel inspired by all this beauty!
Some of the best foliage display is already fading!  


Cold.....

  Go out and snap some photo's!
~jamilyn

Photo's taken via me and property of Living It At Home

Sunday, October 24, 2010

The Little Things...

Having birds back at my bird feeder is making me so happy!  See this little Tufted Titmouse flinging the food around?  They have been eating so much food I have had to fill the feeder many times over!  I seem to have more birds this year and they are really hungry (go here for more photo's).  Getting fattened up for the winter.  Is this an indication of how harsh the winter is going to be?  I hope not!  I know it is coming and Massachusetts winters can be tough and long, but, I am in denial!  I am slowly removing my summer clothes and replacing them with turtlenecks and coats.  I am creating quite a mess trying to get organized.  I guess it gets messy before it gets better.  I am already wearing my knitted Uggs almost every day now.  Coziest shoe I own!  Got them from the Walking Company.  They have the most comfortable shoes!
Classic Cardy Uggs

On this fall day in New England, it is all about the little things that are making me happy!
xojamilyn

{Bird photo via me, Uggs image from The Walking Company}

Friday, October 22, 2010

Finger Lickin' Good...Ewww and Yum!

Are you trying to find that perfect treat to serve to your guests or trick-or-treaters?  Severed finger cookies will do the trick!  Warning:  They look so real that they may run screaming from them!  Seriously, I was so excited to make these and brought them into my daughter's first grade class (years ago) and the kids wouldn't touch them!  The adults had a great time eating them though!  I posted these last year and they are a huge hit so I am bringing them back!  The best Halloween cookie I have ever made mostly because it is so effective! They taste yummy too!  Make them if you dare!  Recipe below...


Bloody Severed Finger Recipe


1 cup butter, softened
1 cup confectioner's sugar
1 Egg
1 tsp almond extract
1 tsp vanilla extract
2 2/3 cup flour
1 tsp baking powder
1 tsp salt
3/4 cup almonds, whole blanched (not sure what blanched means, I just bought "slivered" almonds for the nails)
1 tube red decorator gel
 Preheat oven to 325

Cream the butter with powdered sugar.  Mix in egg, and extracts until creamy.  Sift and add the dry ingredients.  Blend to make a soft dough.  Wrap and refrigerate dough until it is easy to work with (about 15-20 minutes).  Roll into a finger shape about 3" long and 1/2" thick (They will rise when baked so make them smaller than you'd like the finished finger to be).  Place finger on lined cookie sheet.  Using a butter knife, lightly press a flat nail bed shape at the end of the finger and cut 3 lines in the middle of the finger to form knuckles.  Press lightly above and below knuckle to make finger more realistic (give it shape).  Bake at 325 degrees for 20-25 minutes.  Remove from oven and let cool for 3-5 minutes.  Put a bit of red gel in the nail bed and press the almond fingernails into the end of the finger.

*Arrange fingers on a nice platter, add some spiders to crawl over fingers.  Try and make them as real as possible!

Have fun making these and let me know if you do!

xojamilyn

Photo's taken via me, recipe via Living It At Home


Friday, October 15, 2010

Whimsical Halloween Wreath You Can Create For Your Door

My House
Spider Halloween Wreath Hand Made By Me!
What you will need
Large twig wreath from craft store (Micheals)
Black Paint
Black spray paint
White paint
Hot glue gun
Sponge for distressing effect
Wooden Halloween sign (mine says trick or treat)
Spiders (large, small, glittery spiders)
Cheese cloth
Halloween inspired ribbons (I used black, white and orange)
Glitter paint (Silver glitter)
Spider web for back of wreath
Orange fall leaves
White and black tulle fabric
Small battery operated halloween lights to string through wreath (optional)
Instructions For Spider Wreath
So now take all those yummy ingredients and get creative!  There is no right and wrong, just lots of fun to do!  First I spray painted the wreath black (let dry).  Then I used a lot of hot glue to add decorations to the wreath.  One suggestion is to put on those cheap plastic doctor gloves while aging the fabrics.  I put a little bit of black paint on my gloved hand and mushed up the fabric between my hands giving it a decrepit look.  I then tied it around different parts of the wreath tearing the edges for a better effect.  For the sign, I distressed that with a sponge and paint by dragging it across.  I also used glitter around edges too.  I then embellished with spiders and leaves and whatever else looks creepy!  I made this wreath about 6 years ago.  It is still holding up well.  It doesn't matter if it gets old and worn out looking, it just adds to its charm!  I hope you take on a fun and easy project like this! (I have made others and may post them too).  

Have fun!
~jamilyn

{Halloween Spider Wreath hand made by Living It At Home, Photo's via me}

Tuesday, October 12, 2010

Feed Your Friendly Birds!

Just a friendly reminder to get your bird feeders cleaned and filled with delicious seeds for your local bird population!  I know she is not a bird, but sometimes I feel she is...kind of a like a chicken in a lot of ways!   While outside cleaning the bird feeder I decided to do a photo shoot with a pumpkin and Maggie (she is the white fuzzy thing).  She was pretty good at sitting {one of her best tricks she learned}.  She is my little shadow buddy.  Right there investigating what I was doing so of course I couldn't leave her out!
She really liked her new pumpkin friend!

I took this "peek-a-boo" moment last winter of this Black Capped Chickadee (our state bird).  Don't forget about these little guys! They need our help in the coming months! Adorable!  I am looking forward to photographing all the different birds that will visit the bird feeder.  Just not looking forward to standing out in the freezing cold and snow to get the perfect shot!  To see more photo's of my birds, go here.

Enjoying this beautiful fall New England day!
~jamilyn

{Photo's property of Living It At Home and taken via me}

Friday, October 8, 2010

Creative Kids Costumes~Over The Years...

I find that just running in to a store and buying a cheap costume in a bag is really hard for me to do.  I get really excited when I come across something...like a mask...and create a whole costume around it.  It really isn't that hard and it is fun to get your child involved in the process.  I hope you get some ideas from costumes we have designed and thrown together over the years!  It has been great fun!  Costume this year will be a "Spunky Alice In Wonderland".  We are hitting the thrift shops for a unique dress, adding stripped stockings, ect...  Should be interesting and we need to get busy shopping!
 Raven Princess (above) was centered around this feathery mask.  Items used...black old velvet dress cut up (even if it is too small, you can use parts of it), cheescloth (hurry sells out fast), and black netted spider fabric (fabric store), we added a black crow for her to carry too.  This was fun to create!
 Headless...cannot take credit for this one but thought it to be so fabulous and realistic!

 Spider Princess and Ghost.  Again, used black spider fabric, spider hat from dept. 56, black dress, black jewelry.  For the ghost we used lots of cheescloth hanging over a white fabric that I cut up and made a whole in the middle to hang like a poncho.  Cute ghost stockings we found at a store.  I entwined spiders and bats throughout white spider webbing and drapped over costume.  Black and white makeup on face for eerie effect!  Having a missing tooth helps!  Just don't pull one out for the costume!


 The tiger costume, below, was store bought and came in one of those dreaded bags!  This was before I realized I could actually create a costume.  Still adorable though!  Bat girl (right) I made from a black leotard.  I cut purple felt and used fabric glue to adhere it to front and insets for ears.  I used silver fabric glitter to add sparkle and detail.  I also purchased black velvet and cut out bat wings and used the glue to add it across back and arms so when she opened up her arms she had wings!  Also added a black feathered boa around neck line.  Cute spider stockings we found at a store.  Super cute!


Spider Fairy was easy using pieces we picked up here and there.  Mask, wings, and wand we found at iparty store.  Used a swag of purple whispy fabric to make a sash then hot glued glittery spider to front.  Old black dresses that I could distress by cutting ragged edges.  Black stockings and boots we already had too.  Came out great! {Wreath in background I made, another story!}

Pippi Longstocking was a last minute decision.  Floral wire in braids gives the effect that her braids are sticking out on their own.  Freckles made with brown eye pencil across nose and cheeks. Dress and stripped stockings we already had!  
This Japanese Princess costume, I love!  My daughers idea completely!  However, we purchased the umbrella ($5.00) and dress ($15.00) in China Town here in Boston.  Hair up in little pony tails and eyeliner for effect.  Stockings and boots we already had!  Very happy with how it turned out!

Finally, Butterfly Girl.  Wings and mask from iparty store.  Black dress cut in jagged edges and black leggings.  We did use little colorful butterfly's in her bun.  Also sparkly makeup and a pretty clip on glittery butterfly for the dress.  That's it and it was easy!  

I hope I have inspired you NOT to buy a costume in a bag! Hee-Hee!  Have fun!

Happy Weekend!
~jamilyn
{Photo's property of Living It At Home taken via me}